Salesforce is a powerful CRM platform, and MuleSoft enables seamless integration between Salesforce and other systems. By using the Salesforce Connector in MuleSoft, you can easily synchronize data, automate business processes, and maintain consistent data across multiple applications.
Pre-requisites:
To begin integrating Salesforce with MuleSoft, complete the following steps:
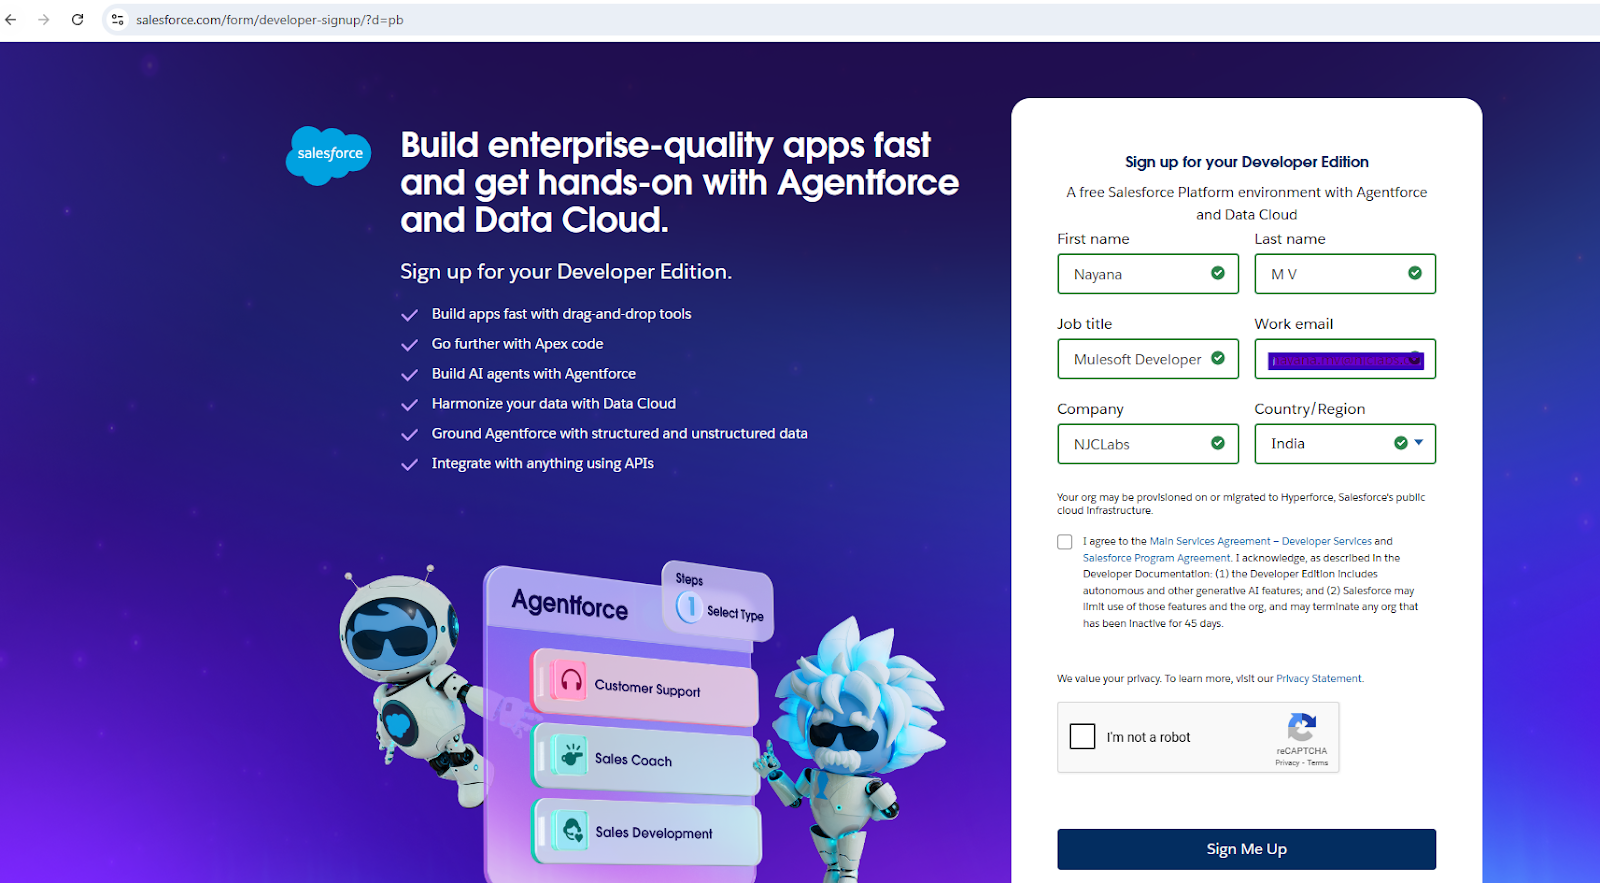
- Create a Salesforce Trial Account
Sign up for a trial account at: https://developer.salesforce.com/signup
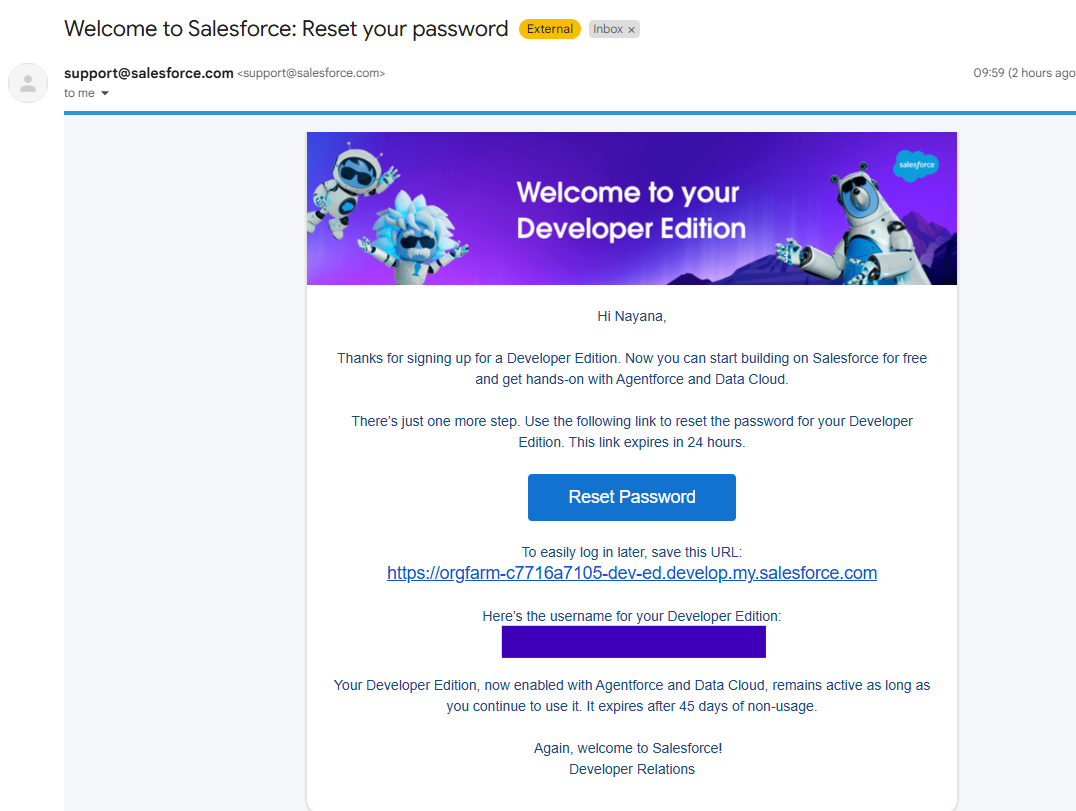
- Reset Password
You will receive a username and a password reset link via email. Use this link to set a new password.
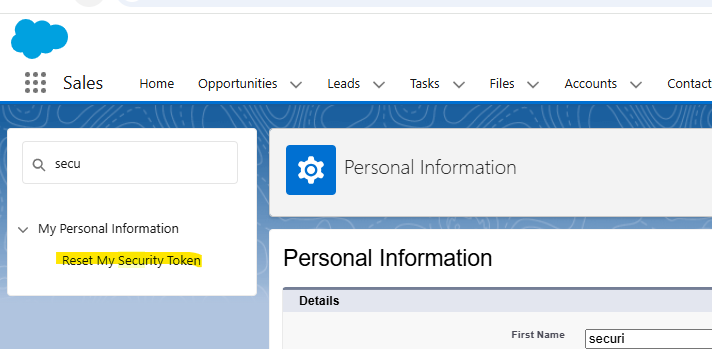
- Generate Security Token
- Log in to your Salesforce account.
- Navigate to: Profile → Settings → Reset Security Token
- A security token will be sent to your registered email address.
Integrating to Salesforce using Mulesoft
MuleSoft Anypoint Studio offers various connectors for integrating with Salesforce. In this guide, we’ll focus on the Salesforce Create Connector, which allows you to create a record in the Account object in Salesforce.
Note:
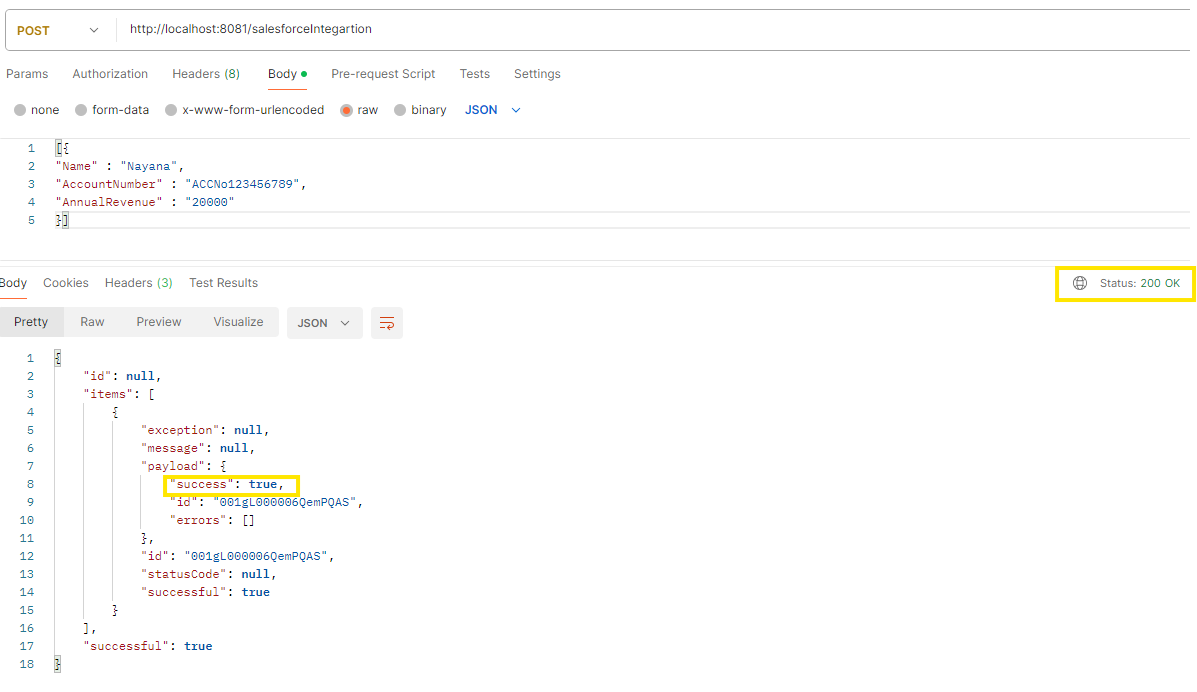
All data sent to Salesforce must use the application/java content type. Salesforce will also return responses in the same format.
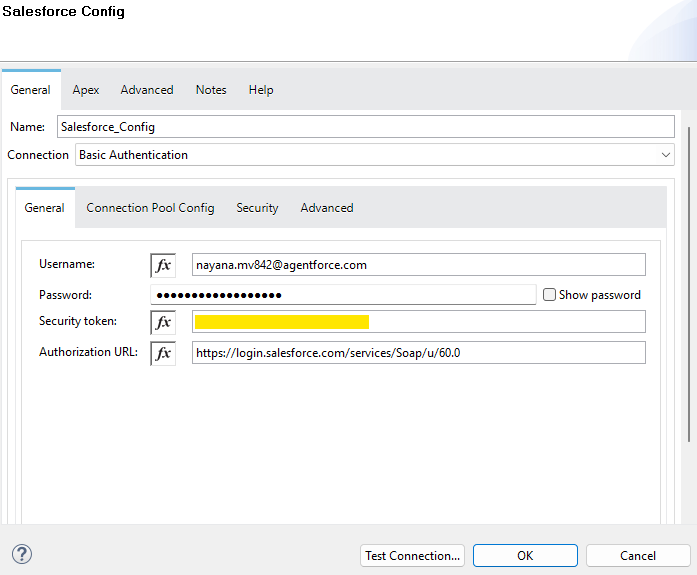
Salesforce create connector configuration
After completing the prerequisites, you’ll have all the necessary credentials to connect to Salesforce via MuleSoft.
MuleSoft supports several authentication methods for Salesforce integration, including:
- Basic Authentication
- OAuth 2.0
- OAuth JWT
- OAuth Username & Password
- OAuth SAML
In this guide, we will use Basic Authentication for connector configuration.
Basic Authentication Connector configuration
Authorization URL:
https://login.salesforce.com/services/Soap/u/60.0
Provide the following values in the connector configuration:
- Username
- Password
- Security Token
Refer to the screenshot below for the configuration example:
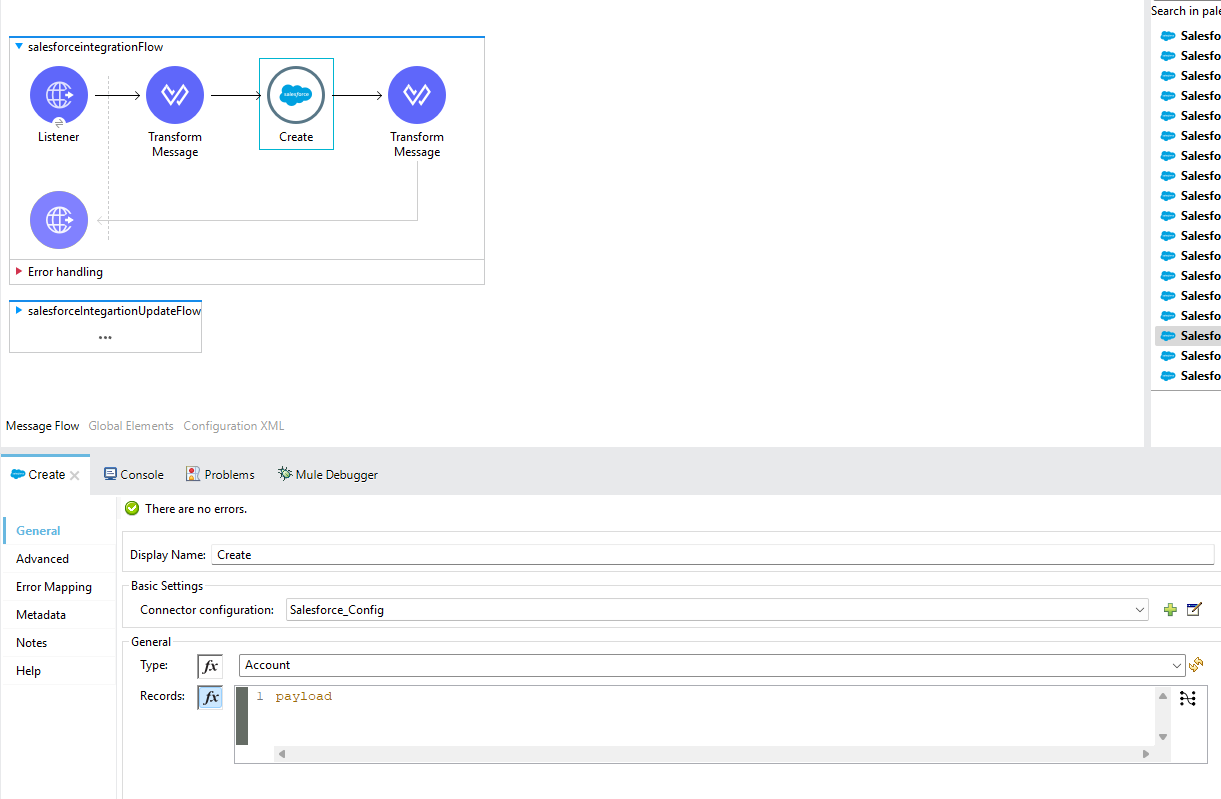
Demo Example: Creating a Salesforce Record
Objective: We are creating a record in the Account object in Salesforce.
- HTTP Listener – Configure an HTTP Listener with the POST method to receive incoming record data.
- Transform Message – Convert the incoming payload to application/java format using a Transform Message component.
- Java Object Conversion – The payload is transformed into a Java ArrayList object.
- Salesforce Create Connector – Use the Salesforce Create connector to insert the Java object into the Account object in Salesforce.
- Success Response – Upon successful insertion, a confirmation response is returned.
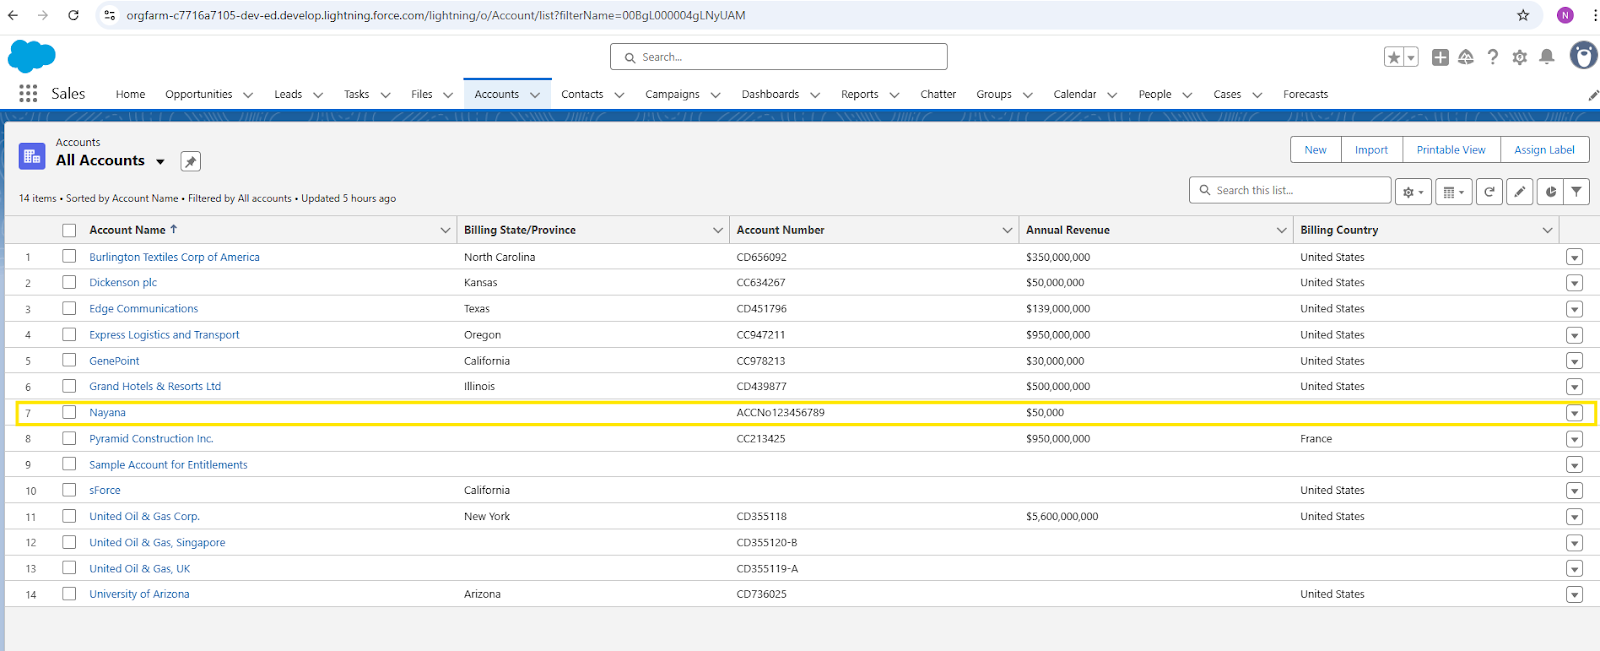
- Verification – The newly created record can be viewed in the Salesforce Account object.
Mule flow Screenshot:
Postman Screenshot :
Salesforce record added in Account Object:
Note:
You can connect to Salesforce using a similar connector configuration to perform other CRUD operations (Create, Read, Update, Delete) with the respective Salesforce connectors.
Want to dive deeper into Salesforce integrations with MuleSoft? Click here to explore more.