Introduction In this blog, we will learn a little bit about AWS API Gateway and how we can integrate it with MuleSoft Anypoint Platform.
Let’s learn a little bit about AWS API Gateway and how we can use it with MuleSoft Anypoint Platform
Before that let’s sum up what an API gateway is.
An API gateway is an implementation tool that sits between a client and a collection of backend services. It acts as a reverse proxy to accept all application API calls, validates, aggregates and then returns the appropriate results.
According to MuleSoft, an API gateway allows you to add a dedicated orchestration layer on top of our backend APIs and services and to help us separate orchestration from implementation concerns.
Amazon says, the Amazon API Gateway is a fully managed service that makes it easy for developers to create, publish, maintain, monitor, and secure APIs at any scale. It also handles all the tasks involved in accepting and processing up to hundreds of thousands of concurrent API calls, including traffic management, CORS support, authorisation and access control, throttling, monitoring, and API version management.
So having refreshed our minds, let’s really think about why we need an API gateway for the Mulesoft/Anypoint platform. Don’t we already have one out of the box for our Anypoint platform account? The answer is both yes and no.
Who needs an external gateway provider for the Mule APIs?
The Anypoint platform subscription comes with API manager as a different component/subscription in the control plane. Of course we get this for a 30-day free trial period time for the trial account, but what if our client’s budget is below the requirement for API manager subscription?
The answer is a safe, external gateway provider for Anypoint Platform. I have personally selected AWS API Gateway for this blog, but we can, however, select any other 3rd party gateway providers of our choice.
Let’s dive into the walkthrough on how to create the API gateway in AWS console and thereafter use it for implementing the NFRs (Non-Functional Requirements) for Mule APIs.
Procedure and WTs
- Start by creating an account in AWS. (you can get a trial account for certain free credits)
- For any operations to be performed and integrated with AWS, we need to create a user under the IAM section of AWS. Navigate to the top right of the console page and click on the organisation name.
- Click on my security credentials and then select users (on the left) from the displayed page.
- Create a user under users section with the Administrator Access. We will then get a prompt to download the IAM user access ID, access key.
- Now from the AWS home screen type AWS gateway and select it. The new page displayed is our main page for AWS gateway.

- Click on create API and we can see the options below in the next page.

- As you can see we have different options like HTTP API, Websockets API, REST API, REST API (private) for creating the new API gateway. All of them are varied according to our choices and use cases, and for this particular WT, we are going to deal with normal REST APIs.
- Select REST API and click on Build. In the page displayed we can see different options like REST, web sockets and whether we want to create a new API for the gateway or clone from an existing API. We even have the option to import the Swagger/OAS specification as shown in the below image.

- For our case, we will be going with REST API and import from the open API option. Since we are creating this API as a gateway for our mule API, we have the option to import our RAML specification as a swagger code and auto generate the resources for the gateway.
- For this purpose go to our published API specification in exchange and download it as an OAS. We can now see a .json file downloaded. Select that file and open it as an OAS using the above mentioned option in the gateway console
- Once you open it we can see the swagger file as given below.

- In the next option endpoint type, we can see three options namely Regional, Edge optimized and Private. Regional APIs are deployed in the current AWS region i.e the region we have set up while creating/setting up the account. Edge optimised APIs are deployed to the cloudFront network and Private APIs are accessible only within the VPCs. For this tutorial we will be going with the Regional option.
- Click on import after selecting all the other options as mentioned above.
- In the next window we can see our specification resources listed up with their respective methods as shown below:

- Click on any of the methods that we want, to start building and observe the Integration type. We can see options like HTTP, proxy, Lambda, AWS service and VPC link. For this tutorial we are going with HTTP because we need to secure and manage our deployed APIs in cloudhub and thereby fulfilling the NFRs.

- Provide the deployed cloudhub endpoint for the respective resource in the endpoint section and method in the HTTP method section. We can also see another option called Content Handling where the incoming data to the gateway can be converted to binary/text if required.
- Click on save.
- In the next window the complete flow of the API calls can be viewed as shown below. We can see stages like Method Request, Integration Request, Integration Response and Method Response. In the method request section we can see all the headers and query parameters auto-populated as and how we have defined them in our RAML specification.

- Go to the Integration Request stage and manually add the query param as in the initial stage to receive the value. This makes the integration request stage ready to receive the QP from the initial stage.

- The Integration response stage by default takes only 200 status code responses, which means even if there is an error from the service call, it will be displayed as 200. So let’s make some regex to support different status codes such as 500,400 etc as given below.


- In the Method Response section simply add all the status codes that we provided in the integration response stage.

- Click on test in the client section of the page to test the API gateway route and call. Look for the success response and Hurray! We tested the API gateway locally. But now let’s make it externally available by deploying it. Click on deploy under the actions dropdown and create a stage for deployment (dev,test,prod etc). There you are with the deployed API url.

- Access the deployed URL using a client tool like postman, ARC and observe the response.

- We have now integrated AWS API gateway with our mule API and also tested the same. Let’s now apply some policies/NFRs like rate limiting, ip whitelisting etc for our API’s.
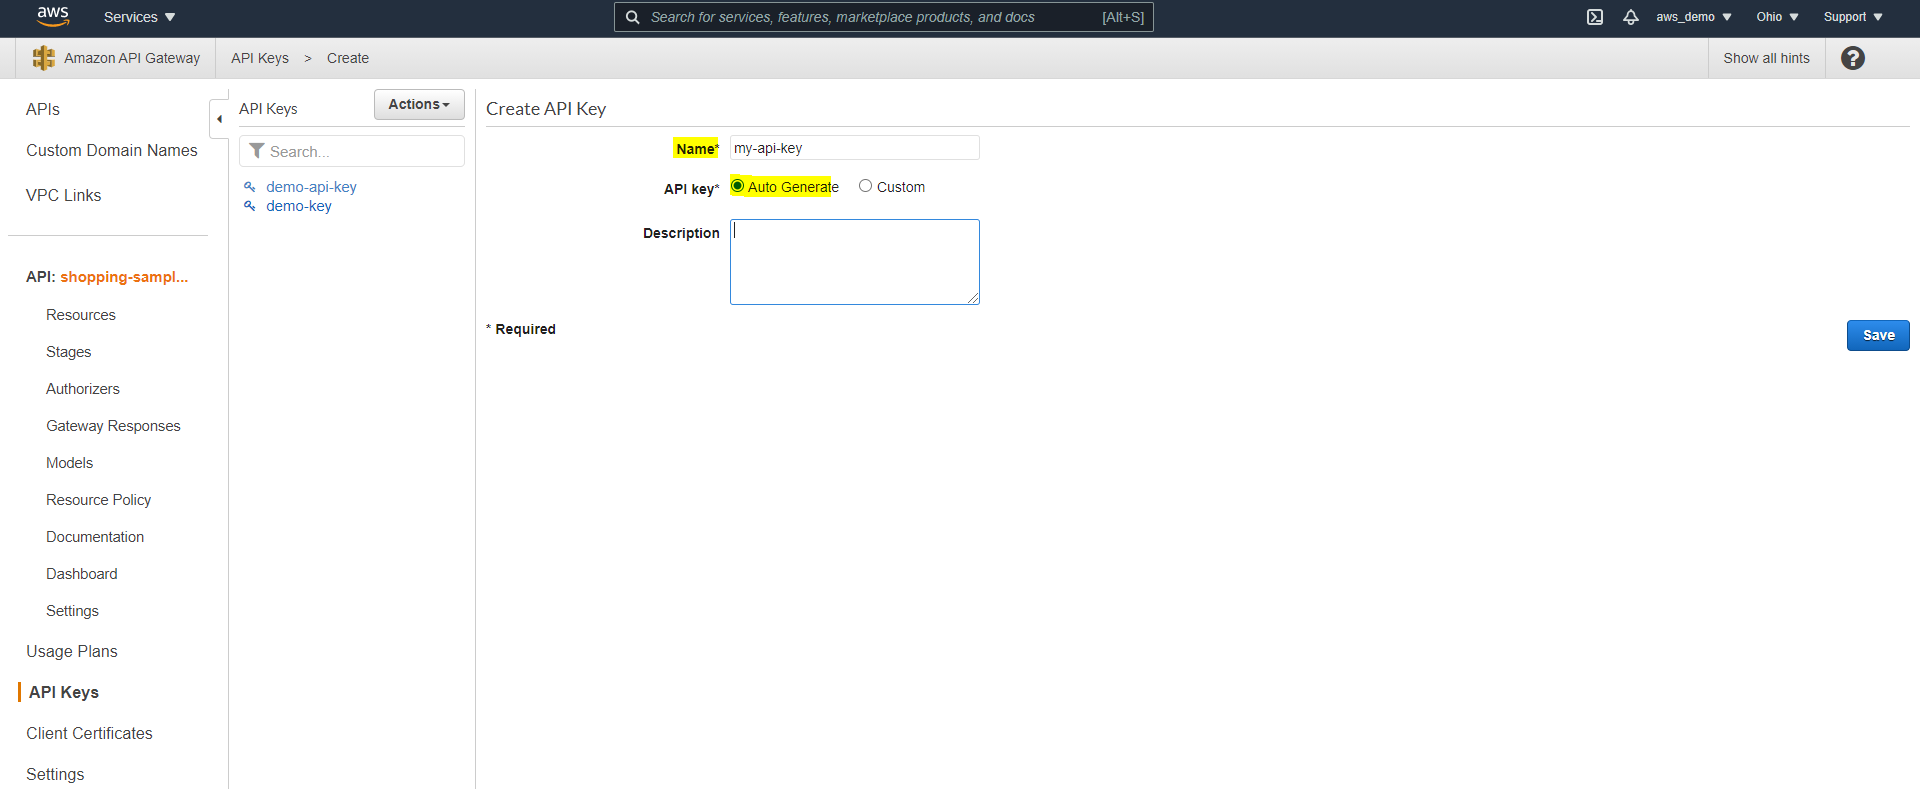
- For applying any policies we need to first create an API key in the gateway. Navigate to the API key section in the gateway page and create one. Select auto generate as the option. (we can also give any custom key by choosing the custom option)
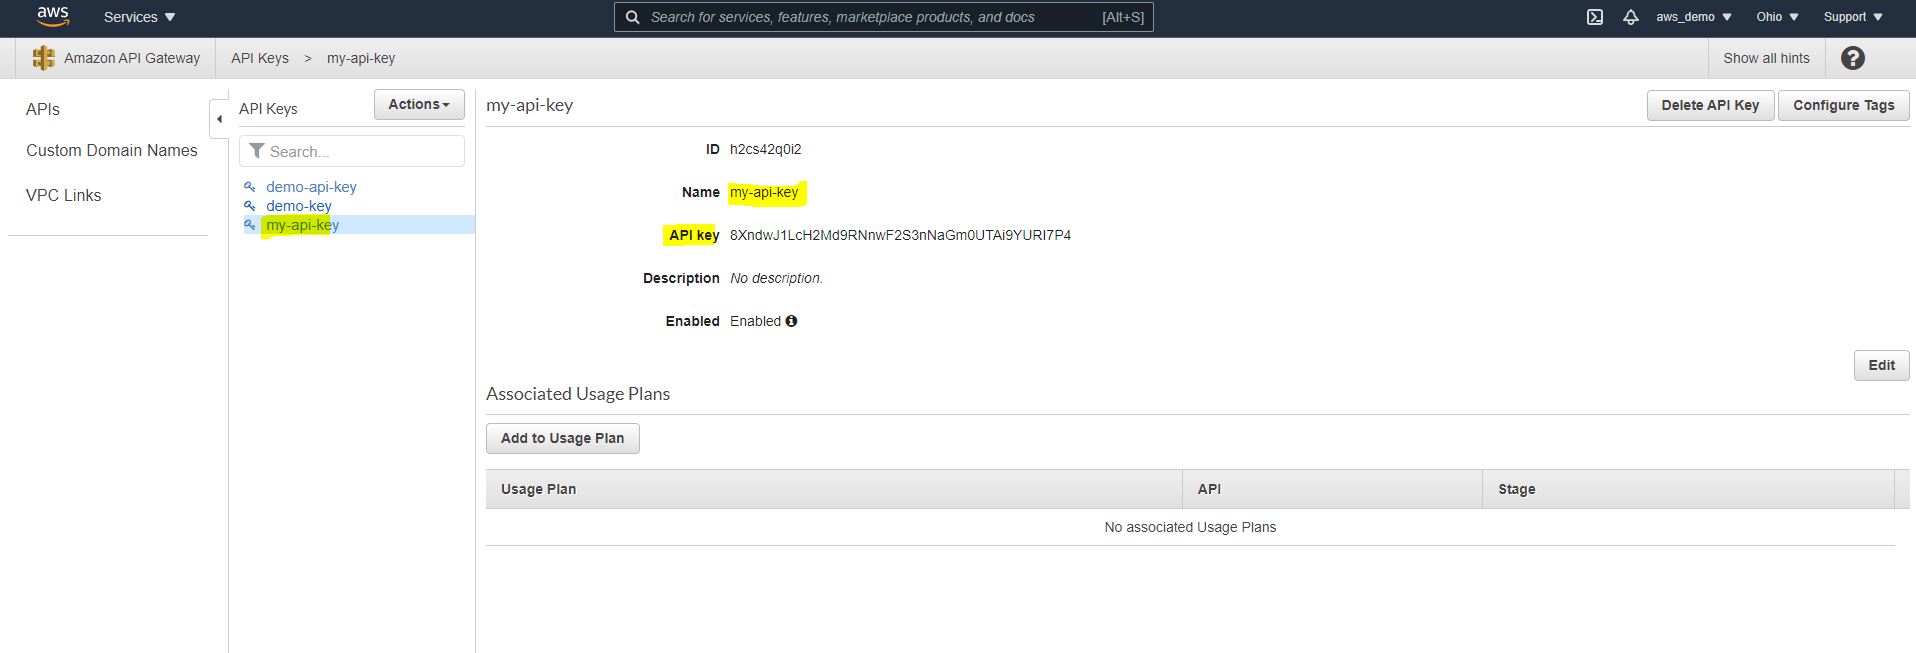
- Navigate to the created key and keep it handy.
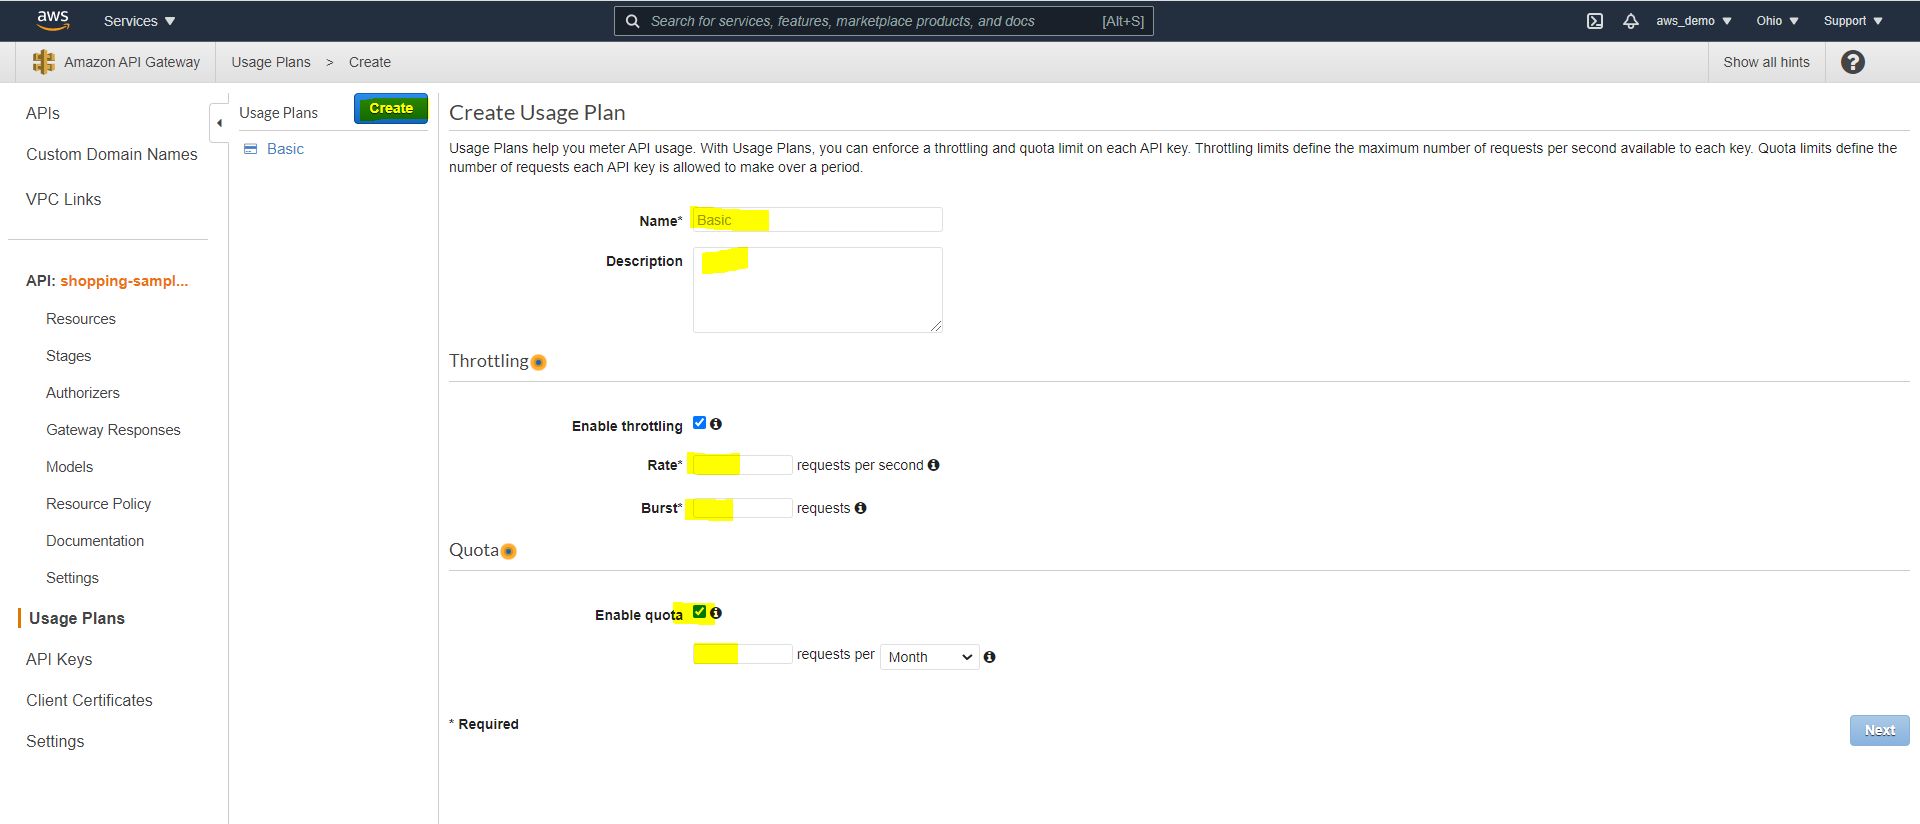
- We have to create a usage plan now to make use of the created API key. Navigate to the usage plan section in the gateway page. Over here we can see the options to define throttling rate, burst rate, quota etc for the gateway. Configure and play with these options as desired and click on next.
- In the next step, we will get a prompt to add an API stage for the usage plan. Choose the stage that we created in step 22.
- Go back to the API key section and add the created usage plan under the Add to usage plan section. (Now we have linked the api-key with the NFRs that we defined for the custom usage plan)
- Recheck and confirm that all the necessary parameters like the API key, stage are configured correctly.
- Go to actions drop-down again and redeploy the API gateway. (whenever a change is made to the gateway API, redeployment of the same is required )
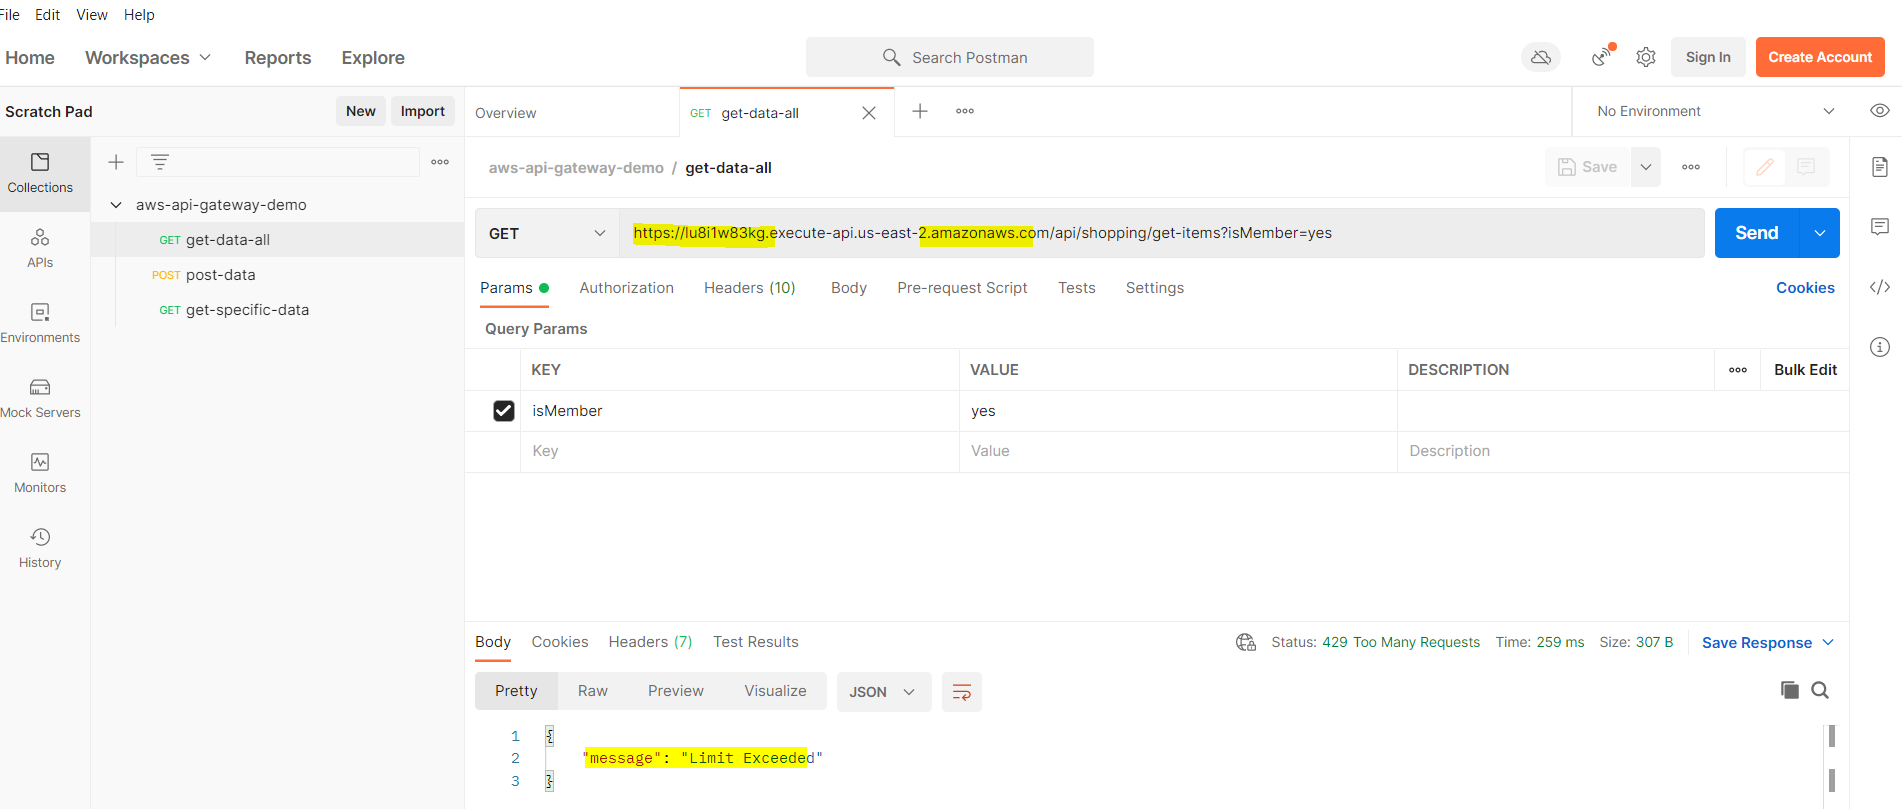
- Copy the deployed gateway URL to a client tool like ARC, postman etc and try hitting it bypassing the threshold we have defined for usage plans. After the limit exhaustion we get a message with status 429 as shown below. We have now implemented a rate limiting policy with AWS gateway for our Mule API.
- Let’s apply a blacklisting/whitelisting policy now. Navigate to the Resource Policy section in the gateway page and analyse the options. Select IP range deny list and observe the auto-populated script. We are going to implement an IP blacklist policy, so we can erase the allow object from the script. Under resource section of deny, since we don’t want any calls from the blacklisted IPs to any of the RAML resources we can replace everything after ‘/’ with ‘*’ (playing wild-card). And under aws:SourceIp field type in all the IPs that we want to blacklist.
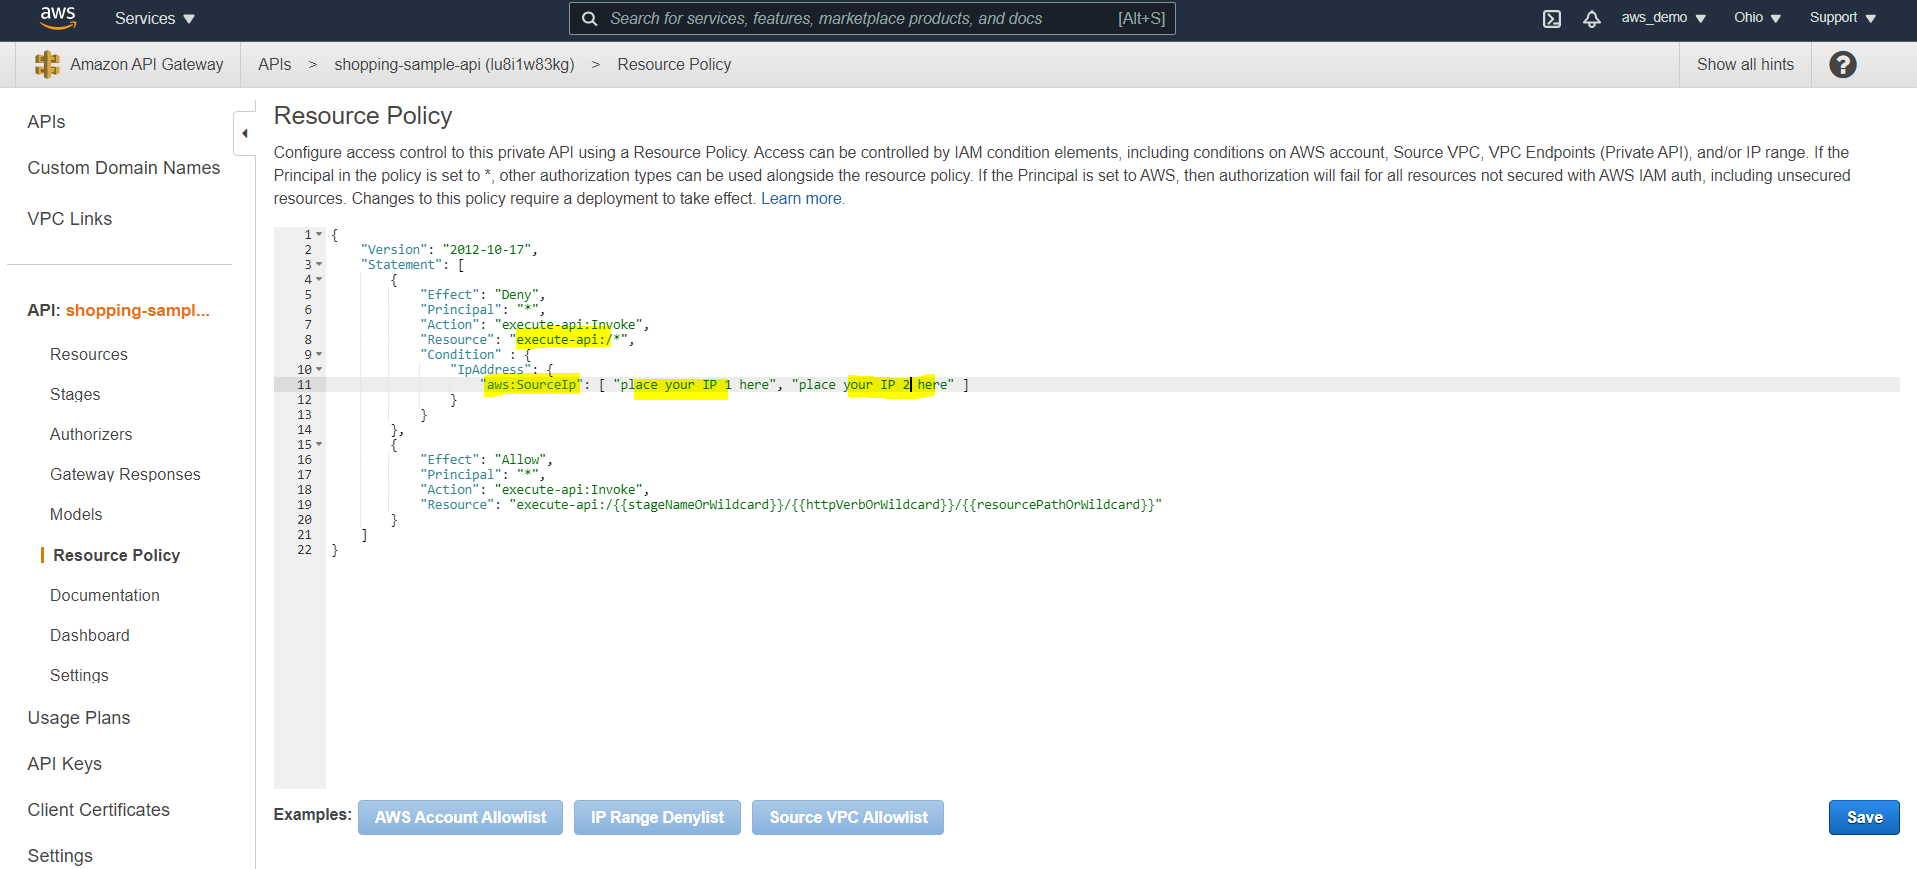
- Redeploy the gateway API again and try hitting the deployed URL from the blacklisted IP. We will then get a response as shown below.

- Hurrah!! We have successfully implemented one more NFR for our mule API with AWS gateway. Well now how can we see the logs of this gateway API? The answer is AWS cloudwatch logs. Let’s also see how we can configure that.
- Navigate to security credentials from the top right of aws console. Select roles in the next page. Click on create role and select API gateway (since we are about to configure logs for the gateway API) and then click on next:permission and we can see by default a policy named AmazonAPIGatewayPushToCloudWatchLogs is applied.
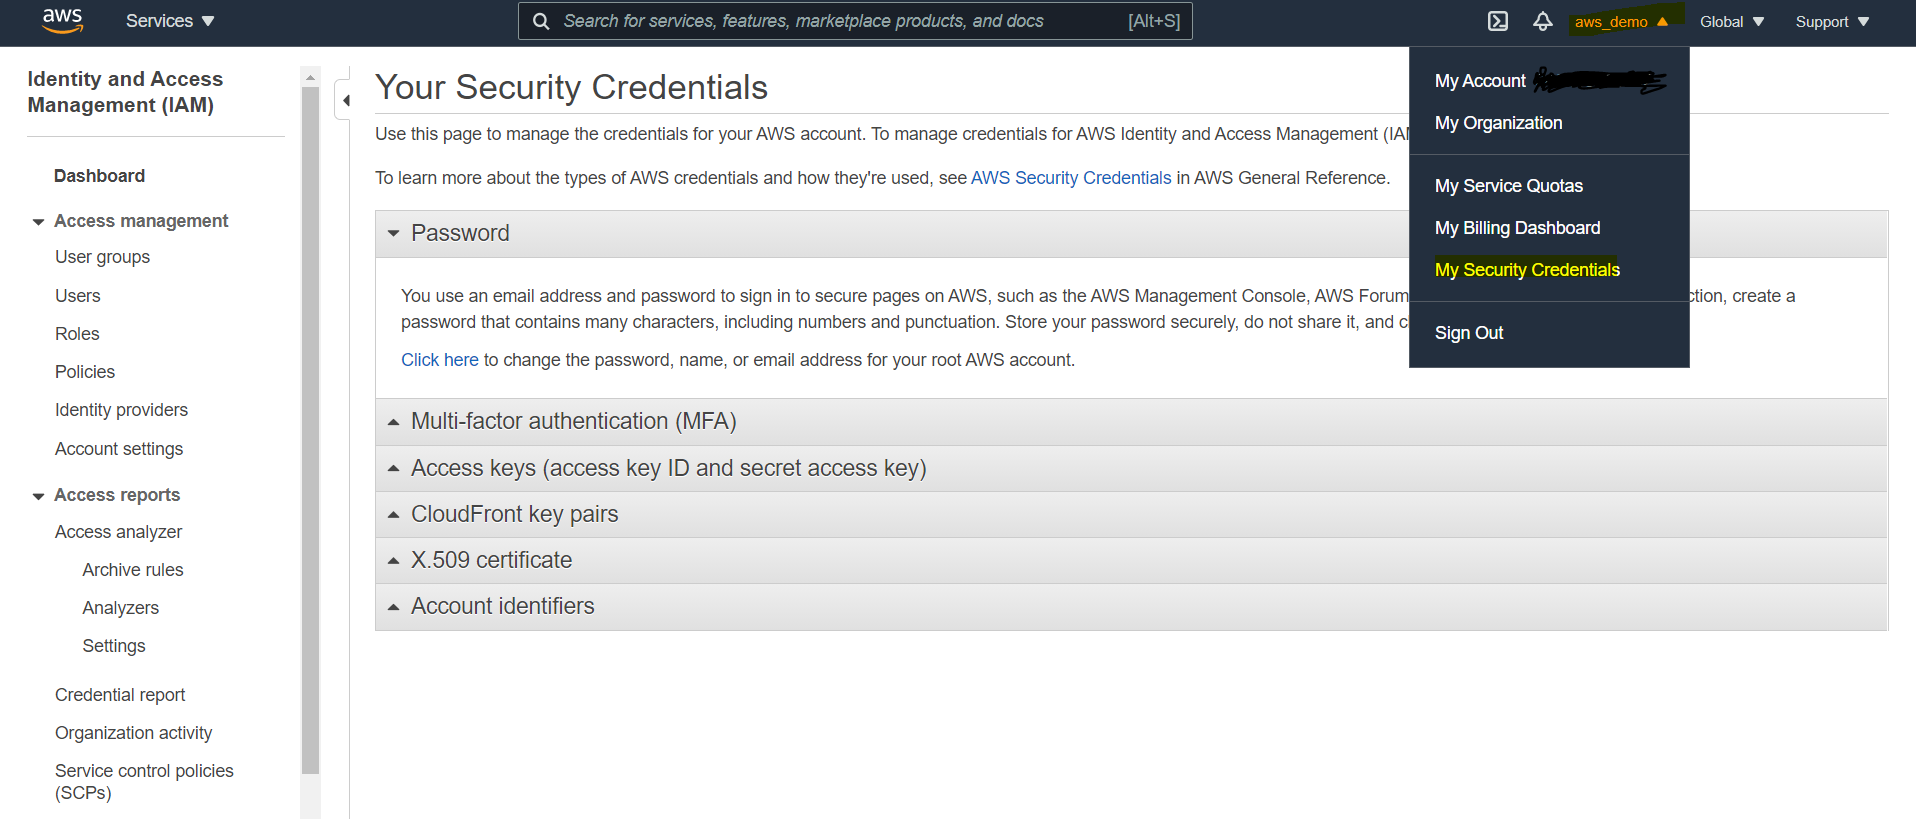
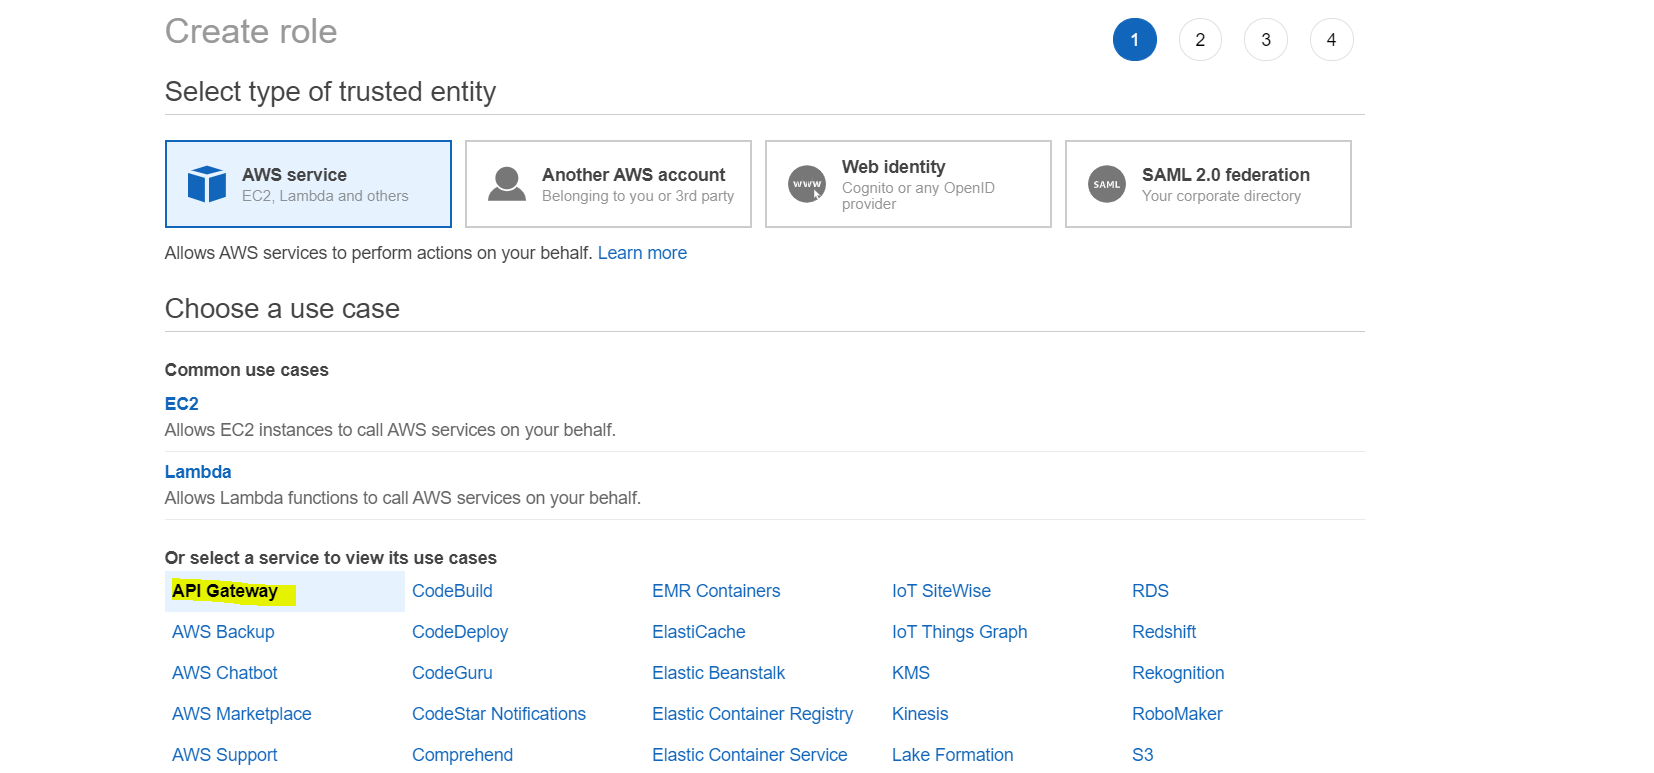
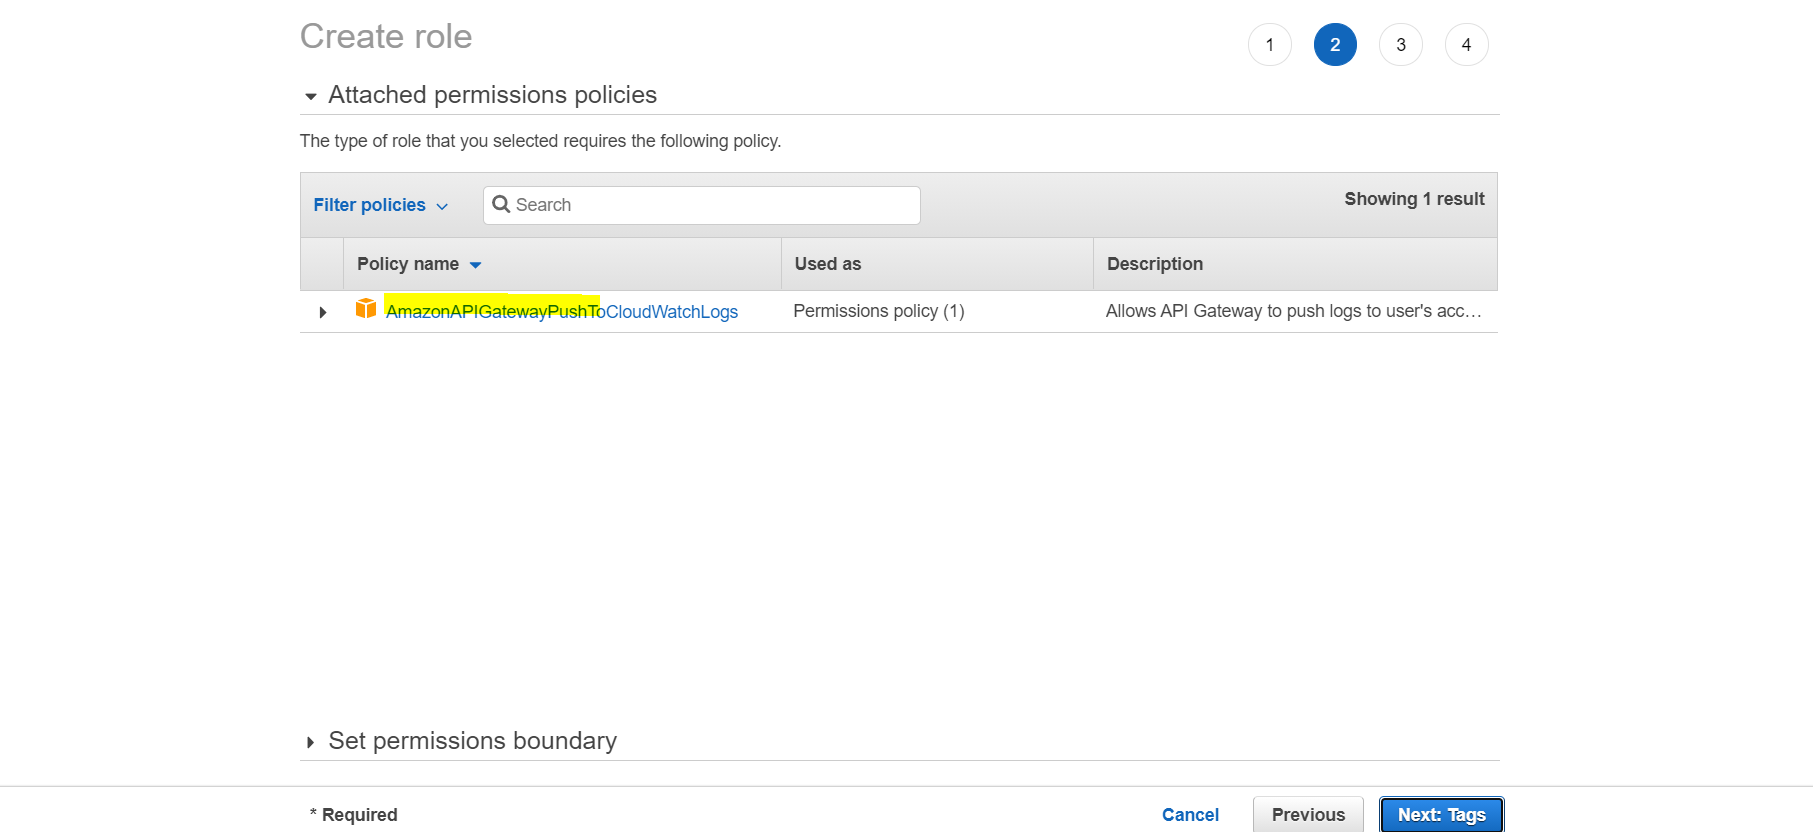
- Click on next: tags and we may skip the next step as it’s optional. Click on next:review and provide any name for the defining role and click on create role. A list gets displayed now, select the created role and copy the role ARN.
- Go back to the gateway page and select settings at the bottom left of the page. Under cloudwatch role ARN paste the copied ARN. Click on save.
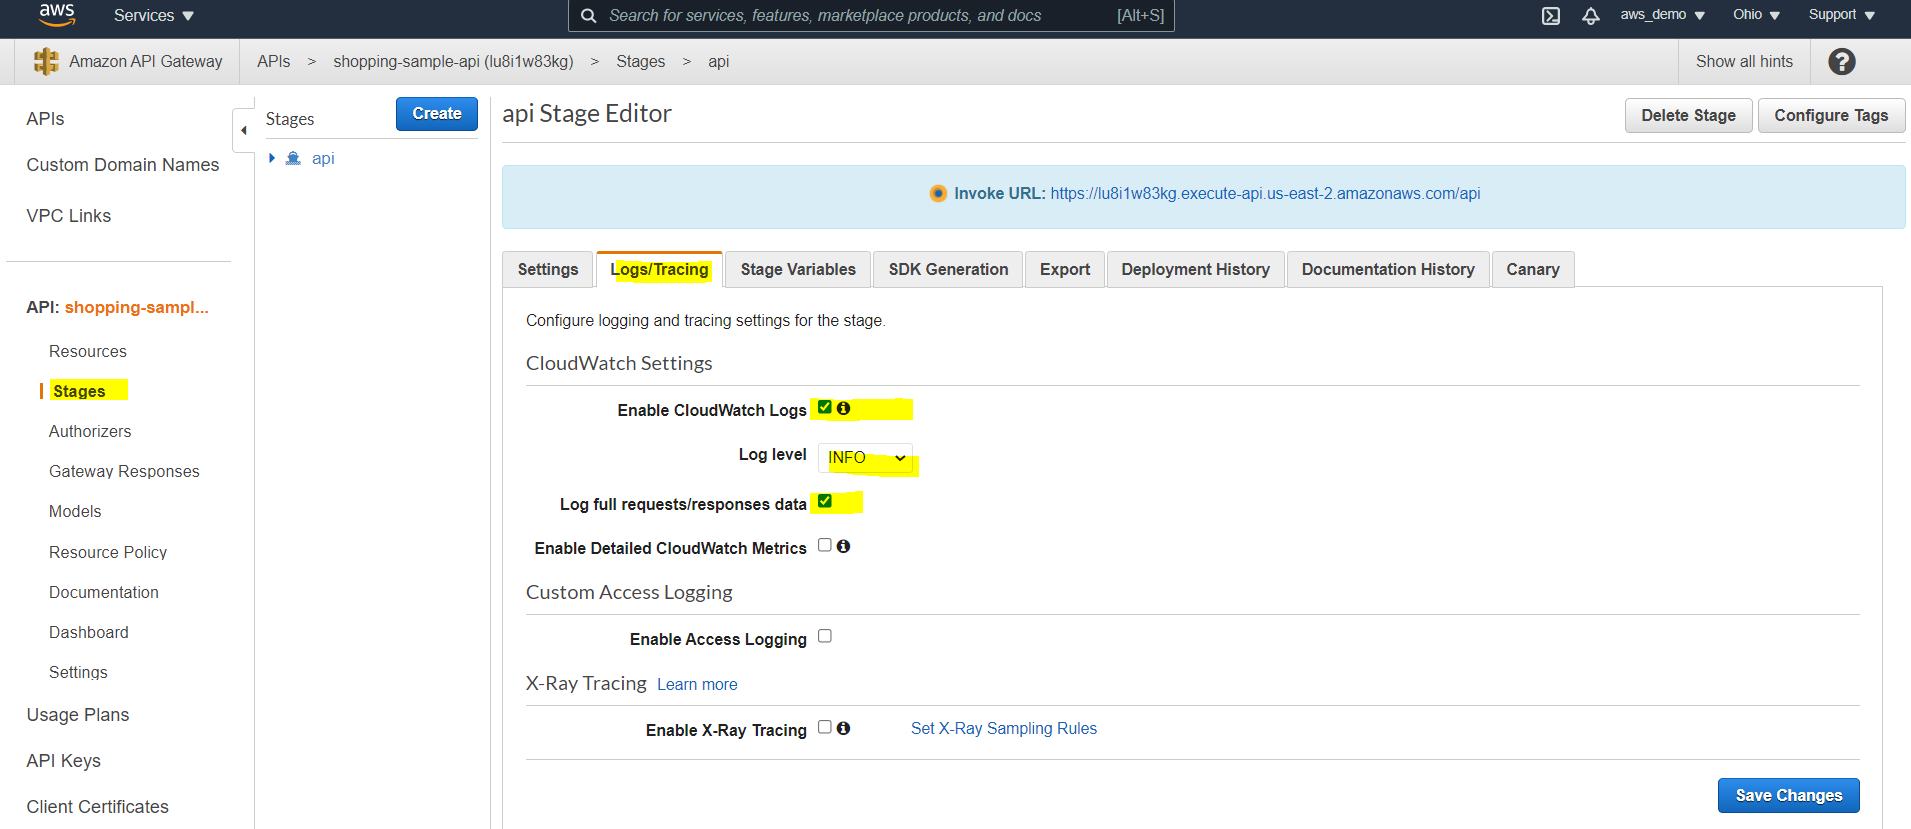
- Go to Stages section in the aws gateway page and enable the cloudwatch logs. We can also select the category of the logs we need to display like INFO, ERROR. Click on save and redeploy the API.
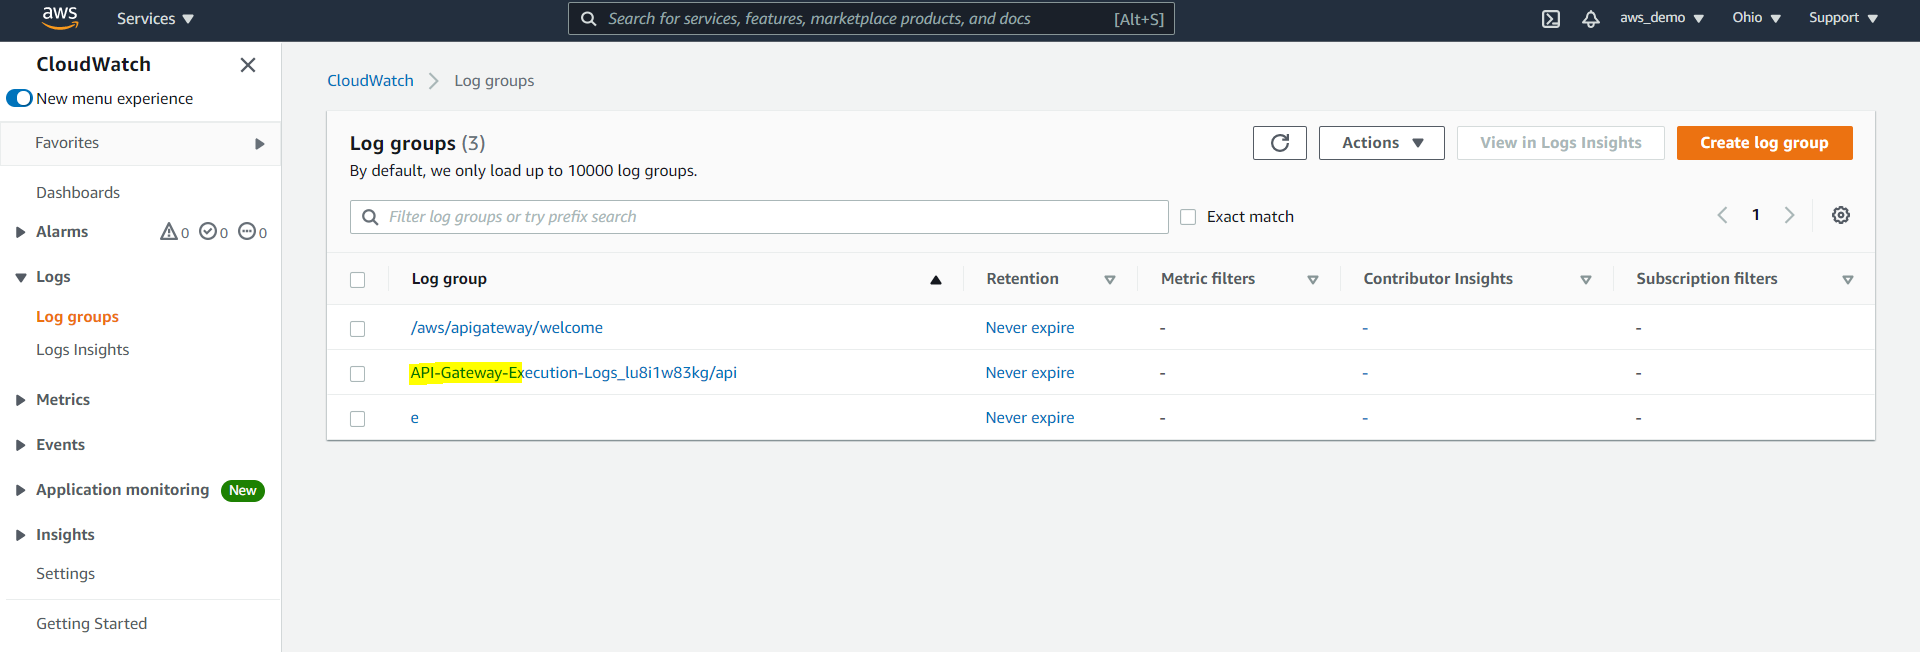
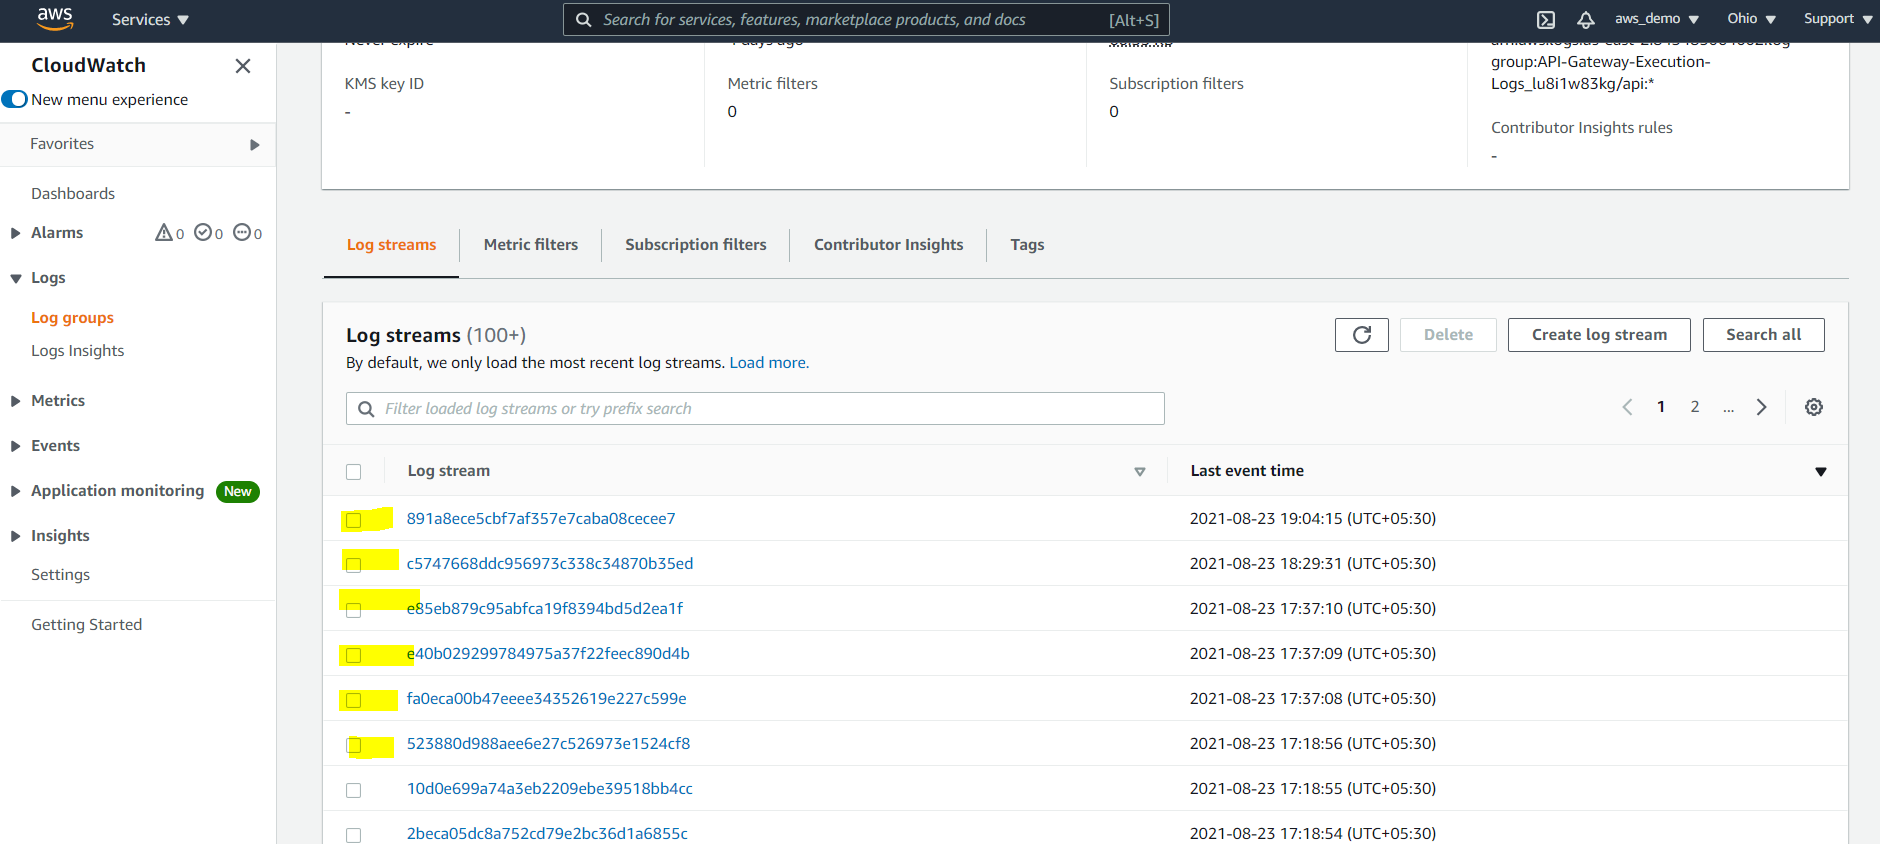
- Search for cloudwatch logs in the search section and select log groups from the left side. Search for API-Gateway-Execution-Logs_ in the search sections and there we are with the API gateway logs. From the displayed list select the ones that we want to view as desired.
Conclusion
We have successfully integrated the AWS API Gateway with the Mule APIs and also implemented the NFRs for the same. There is a lot more that we can do with the AWS API Gateway and Mule by clubbing it with other out of the box features of AWS. Let’s look into it in the future articles.
References
https://docs.aws.amazon.com/apigateway/latest/developerguide/welcome.html