What Is Apache Kafka?
Apache Kafka powers real-time data pipelines and stream processing applications as a powerful distributed streaming platform. It delivers fault tolerance, high throughput, and low latency to manage real-time data streams efficiently. Organizations use Kafka to handle large volumes of data, perform log aggregation, support event sourcing, and drive real-time analytics. It employs a publish-subscribe model to decouple systems and ensure seamless communication.
Kafka works on a pub-sub model and consists of core components such as:
- Topics: It is a category or channel where messages are published. Each topic has a unique name across the entire kafka cluster.
- Producers: Publish data to topics.
- Consumers: Subscribe to topics and consume the data.
- Broker: Kafka server that stores and serves messages.
Operations of Apache Kafka in MuleSoft Palette
- Batch Message Listener: It allows to receive messages in a single batch,useful for improving performance when processing a large volume of records collectively.
- Message Listener: This operation listens to a kafka topic and processes messages one at a time. It’s ideal for real-time data processing.
- Bulk Publish: This operation enables sending multiple messages to a kafka topic in one go. It helps improve throughput by reducing the number of calls.
- Commit: You manually acknowledge the successful processing of a message with this operation. This step becomes essential when auto-commit is turned off.
- Consume: Unlike listeners, this operation fetches messages from Kafka only when the flow is triggered. Used for scenarios where polling is required.
- Publish: This is used for sending messages to a specified kafka topic.
- Seek: This allows repositioning the consumer to a specific offset in a topic. It is particularly helpful when you need to replay messages or skip certain ones based on offset values.
Prerequisites
- Apache Kafka installed and running locally or on a server.
- MuleSoft Anypoint Studio installed.
- Kafka Connector for MuleSoft(available on Anypoint Exchange).
- JDK installed (preferably 11 or above), and set java_home and path system variables.
Step 1: Set Up Kafka
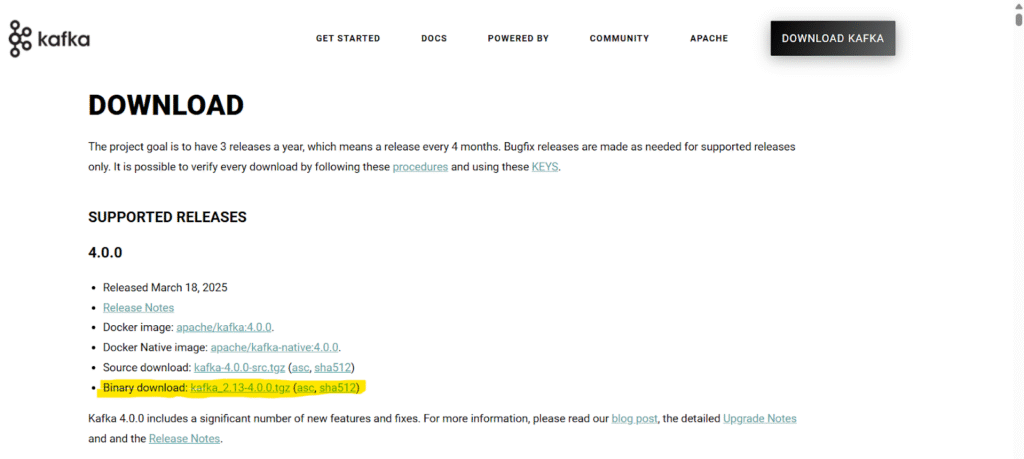
- Download the Apache Kafka from the link. (take the latest version)
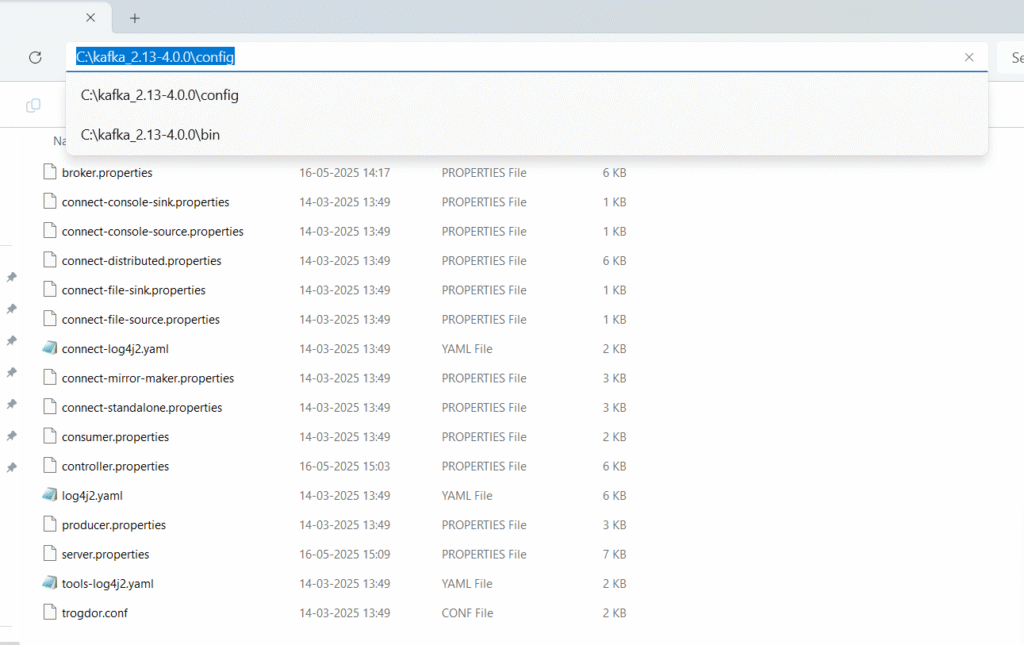
- Extract the folder and keep it in C drive.
- Click on the kafka config directory and edit server.properties, broker.properties, controller.properties.
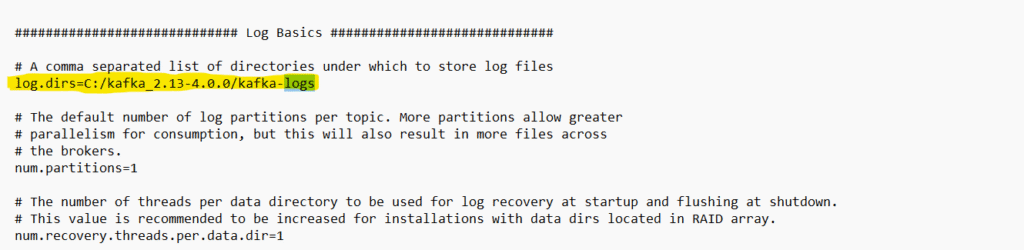
- Search for logs in all three above properties and edit the line from “log.dirs=/tmp/kraft-combined-logs” to “log.dirs=C:/kafka_2.13-4.0.0/kafka-logs”
- Also add controller.quorum.voters=1@localhost:9093 in server.properties.

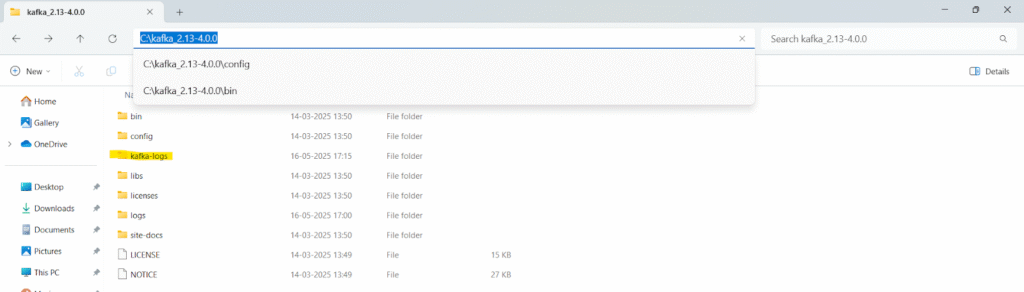
- Create a folder named kafka logs inside kafka.
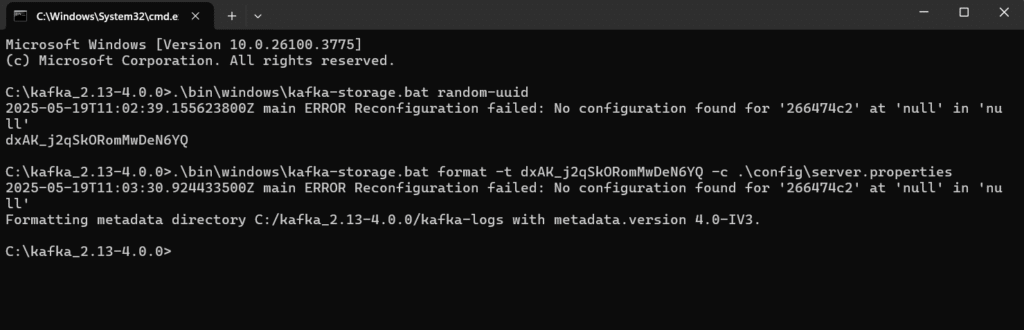
Step 2: Create Random UUID and Assign.
- Generate UUID with below command
.\bin\windows\kafka-storage.bat random-uuid
- Random Id will be generated, which has to be used in next command
.\bin\windows\kafka-storage.bat format -t dxAK_j2qSkORomMwDeN6YQ -c .\config\server.propertiesdxAK_j2qSkORomMwDeN6YQ – random uuid
Step 3: Start the Kafka Server.
- Open new command prompt in the folder C:\kafka_2.13-4.0.0 and type the below command
.\bin\windows\kafka-server-start.bat .\config\server.properties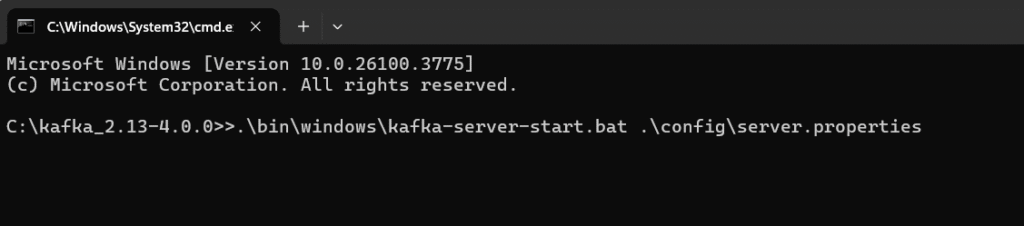
- Kafka server is started.
Note: Keep the server running while testing
Step 4: Create Kafka Topic.
- For creating topic, type the below command
kafka-topics.bat --create --bootstrap-server localhost:9092 --topic samplesample – topic name
Kafka uses localhost:9092


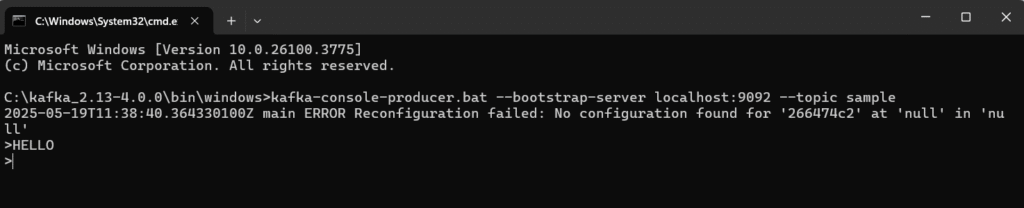
Step 5: Create Producer and Consumer
- Type below command to create producer
kafka-console-producer.bat --bootstrap-server localhost:9092 --topic sample
Type any message
- To consume the message type below command
kafka-console-consumer.bat –bootstrap-server localhost:9092 –topic sample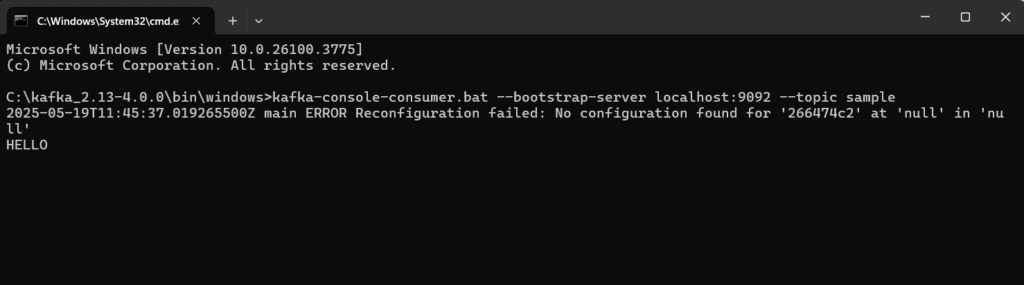
Note: If you want to view all the messages sent, then type below command
kafka-console-consumer.bat –bootstrap-server localhost:9092 –topic sample –from-beginningStep 6: Open Anypoint Studio and Create a Project
To create producer flow
- Create new mule project
- Drag and drop flow component.
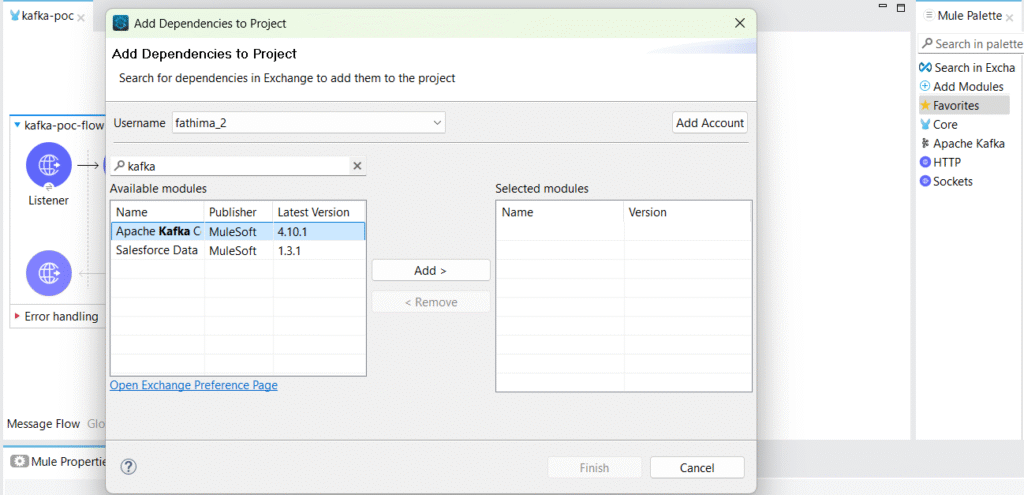
- Search and add for Apache Kafka module from Anypoint Exchange
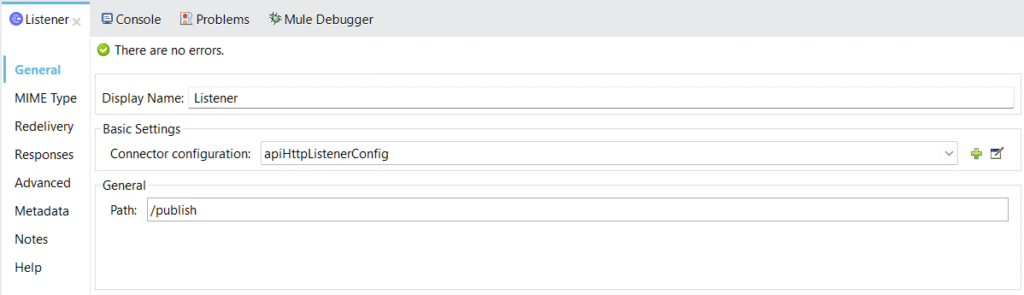
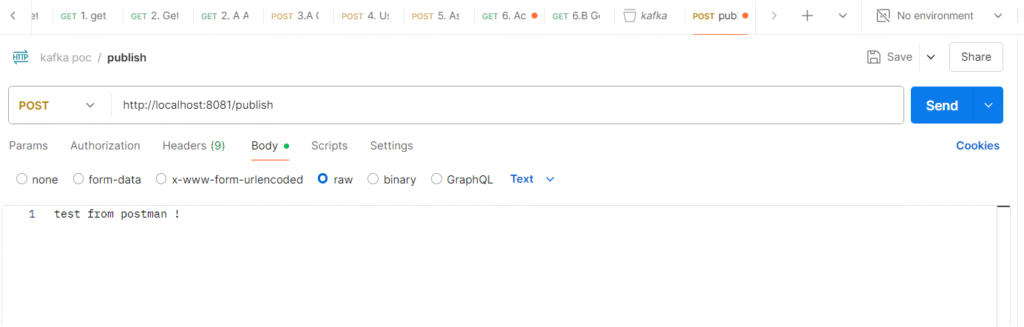
- Drag HTTP Listener from Palette and configure. Set path as /publish
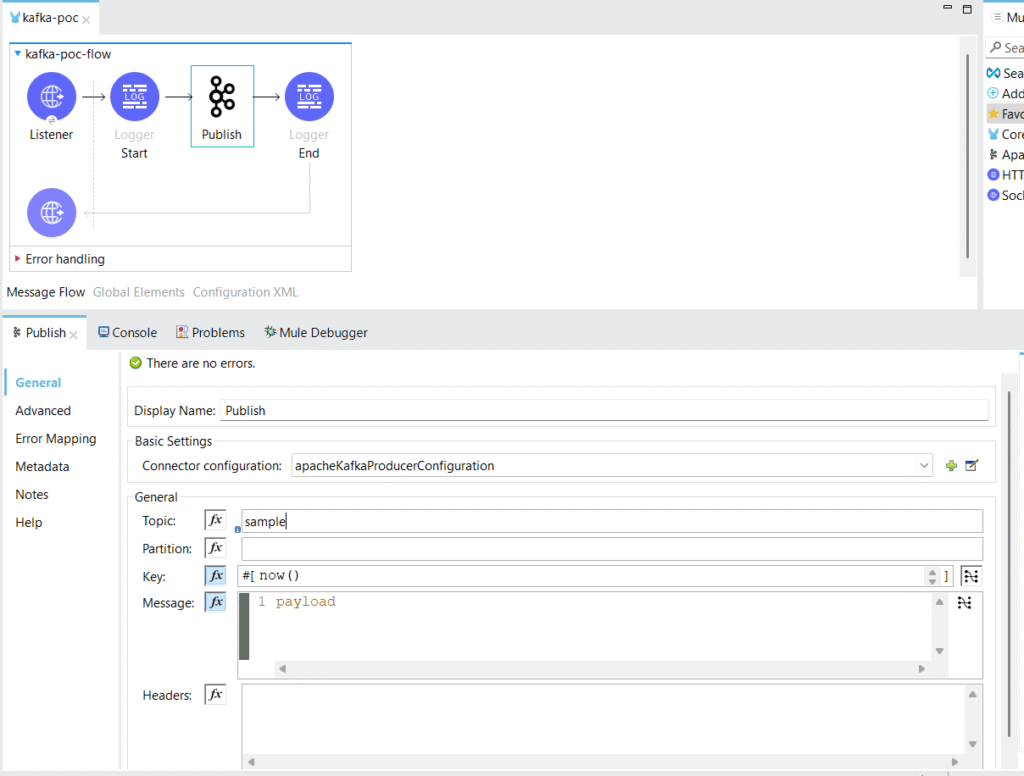
- Drag and drop publish operation from Apache Kafka and configure it

- Provide the topic name, and key as now() for current date and time
- Now run the project
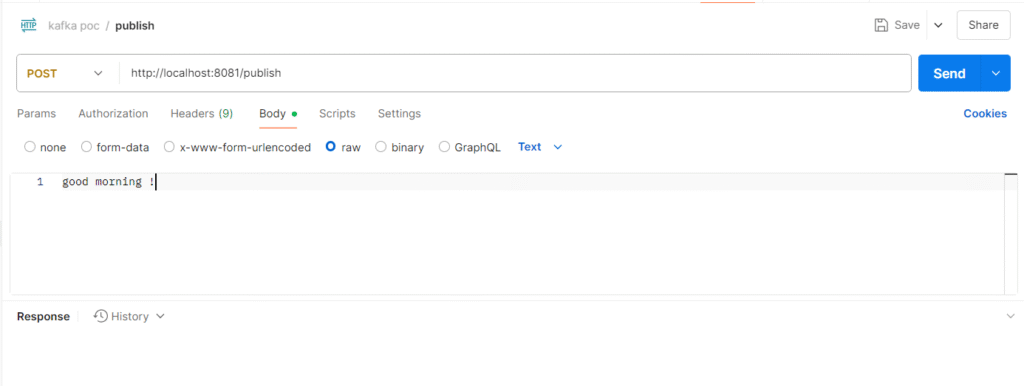
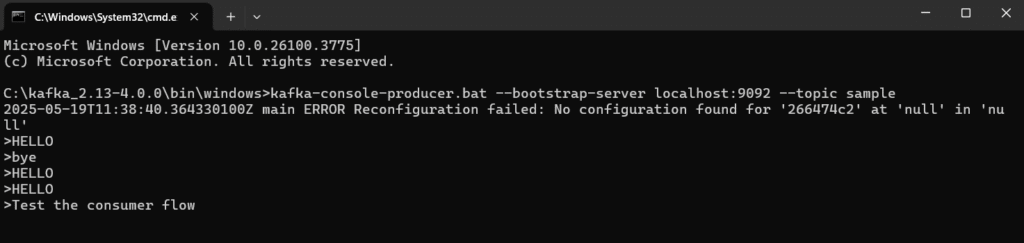
- Open postman and hit the URL http://localhost:8081/publish with body
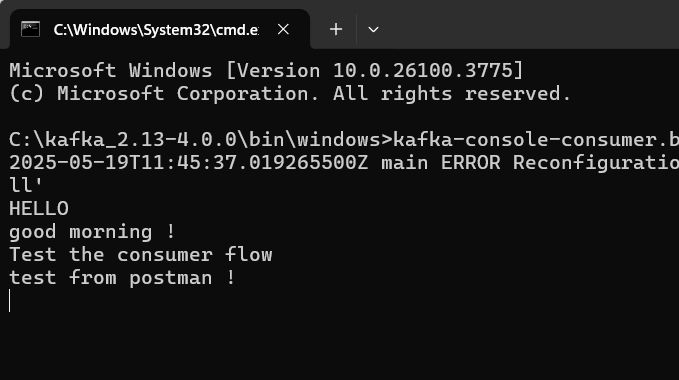
- To verify the message, check the command prompt by running the below command.
kafka-console-consumer.bat –bootstrap-server localhost:9092 –topic sample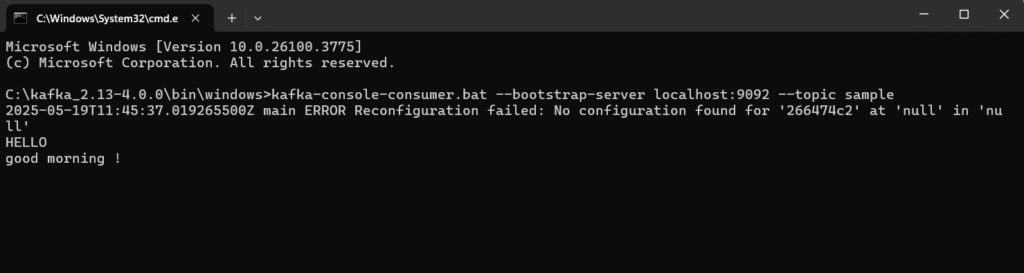
To create consumer flow
- Drag and drop flow component and name it.
- Drag Message listener and drop it in the flow.
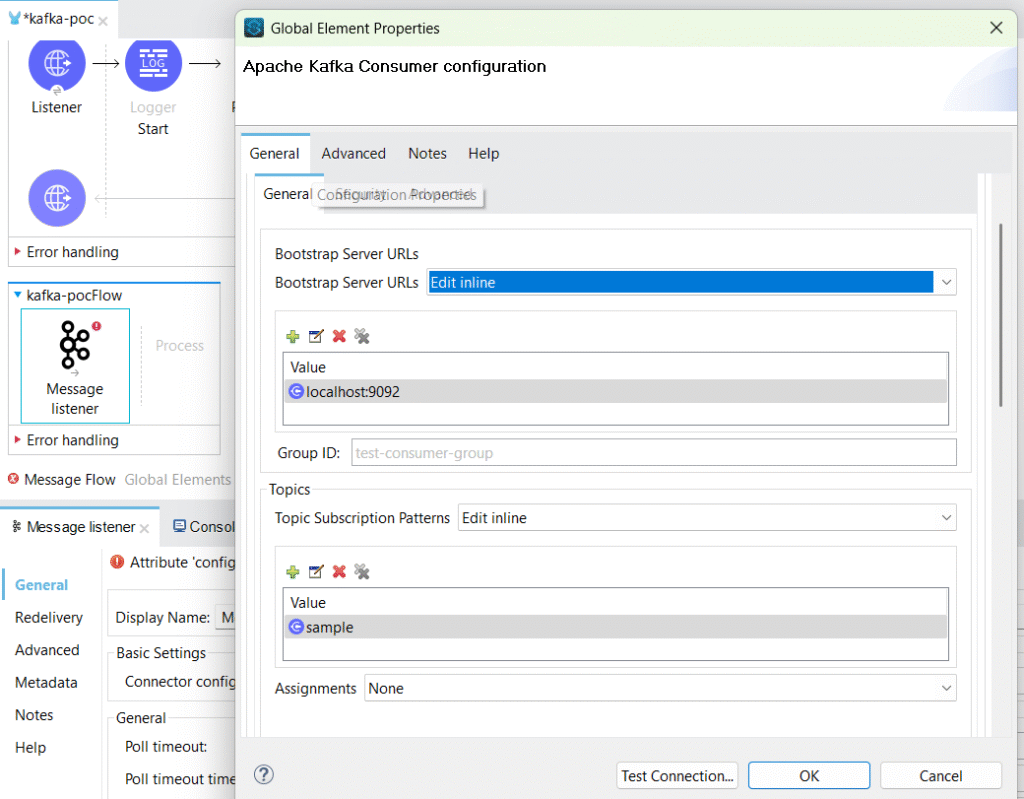
- Add config properties as below.
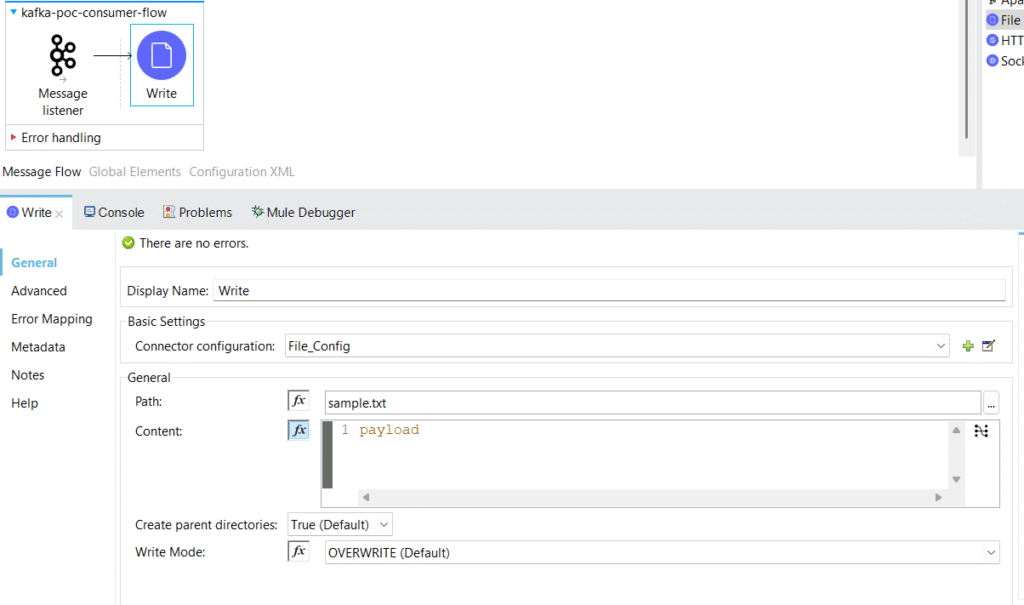
- Add and configure the write operation of the file connector to check for the output.
- Run the application to test.

- From postman testing

Conclusion:
Integrating Apache Kafka with MuleSoft unlocks powerful real-time data processing capabilities across distributed systems. With proper configuration and monitoring, this integration supports scalable, reliable, and event – driven enterprise architectures.